| Introduction Site Map Main Project Email: jja@nac.net |
— Stanislaw Lem, Solaris


Thursday, October 14th, 2004
| In this entry,
I'm showing the first stage in sculpting an Eaiean skull, based on my
sketches. I could have done more detailed drawings to prepare, but I
think better in three dimensions. My plan is to let the detail appear
as I work Below is my canonical sculpting kit: 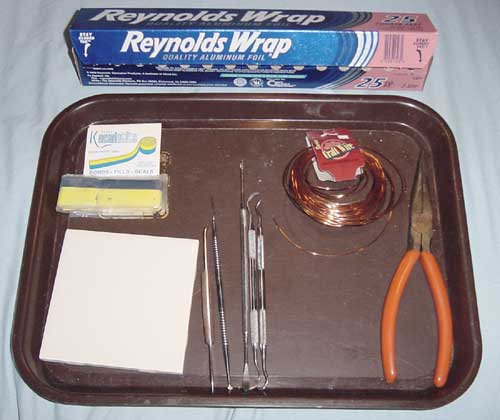 The wire, foil and pliers are for making armatures (inner supports for sculptures). In the center is a variety of dental tools that work well for creating fine detail. At bottom left is a ceramic tile, useful as a base for sculpting polymer clay; the piece can be baked hard right on the tile and removed when done. At upper left is a ribbon of "green" epoxy putty (commercial name: Kneadatite®), which is the material I'm using for this project. The plastic tray is courtesy of Best Western. I have a set of enamel trays handed down from my grandmother, who once ran an ice cream store in Haledon; I like these because they can be placed in an oven, but they're somewhere in storage right now... |
|
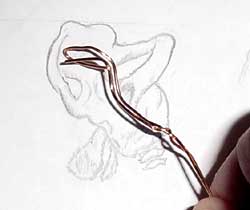 |
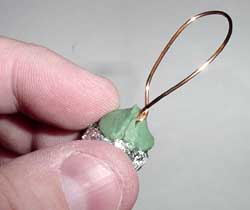
I start by making an
armature from the copper wire. I've decided that I won't be using
the tile; I'll just use a loop of wire on the armature as a handle. There are other delicate bits that will need support; I'll add wires for those at another stage. I assume that I'll only get the lower half of the skull done at this stage. |
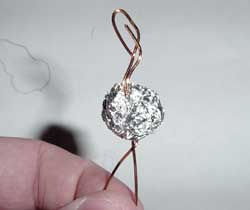 |
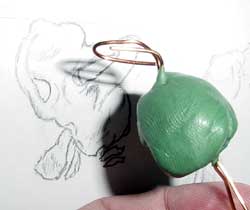
I pack aluminum foil
around the wire. It's much cheaper than the sculpting material. |
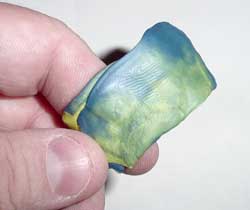 |
I knead the epoxy putty,
which has yellow and blue halves; when it turns a uniform green, it's
thoroughly mixed. I now have about a half hour to work with it. |
 |
I apply the putty to the
armature... |
 |
and check what I've got
against my original drawings. |
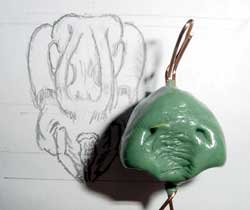 |
I realize that I only
mixed enough putty to do the lower half of the lower half, so I deal.
The curved holes are sockets for the Eaiean equivalent of mandibles. I
create a roughened palate which I see as having rows of sharp
teeth. The mandibles scrape the food over this surface to shred
it. |
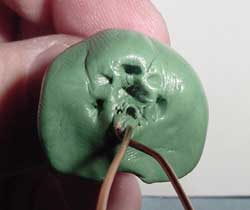 |
Detail that I didn't have
in the drawings - the base of the skull, showing the attachment point
for the spinal column and holes that correspond to the foramen magnum
in the human skull. I think the Eaie have a redundant spinal cord, but
this idea is subject to change. |
Having gone as
far as I can with this section, I suspend the piece and allow it to
cure.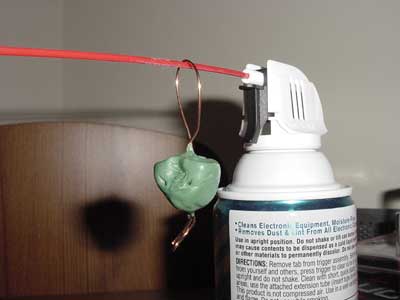 In the next entry, I'll be talking about Ubercon, so I'll be continuing the sculpture discussion at the end of next week, or the beginning of the week following. Until! |
|
pageatatime.com is hosted by net access corporation - www.nac.net